Saturday, February 21, 2026

setting up AI inference computer OMEN 45L GT22-3090

 So far, pretty simple.

Ran win11debloat (to remove the massive amount of crap HP installs)

Remove macafee

    need to set context window to 131072

install VScode -- install AI toolkit -- allows using free large models

Install WSL -- just because

install opencode & ollama


To fix the context menu

reg add "HKCU\Software\Classes\CLSID\{86ca1aa0-34aa-4e8b-a509-50c905bae2a2}\InprocServer32" /f /ve 

taskkill /f /im explorer.exe 

start explorer.exe

Thursday, February 1, 2024

Voron Trident Can Bus EBB36 X end stop relocation


There is so much to change on the carriage that it must be removed.
You can see the Xstop wires here.


Uploading: 38097 of 38097 bytes uploaded.


Friday, January 19, 2024

Voron Trident Can Bus EBB36 upgrade

Note: the printhead LED's connector is reversed.

also reversed is extruder motor (fixed in config).

There was a sticker on the TMC2209 that prevents heat sink to stick.

Recommended order of assembly:

Remove cable chains.  Install both X and Y endstops.

best STL that I found:

https://www.printables.com/model/429169-rigid-ebb36-v12-mount-on-voron-cw2-stealthburner-t
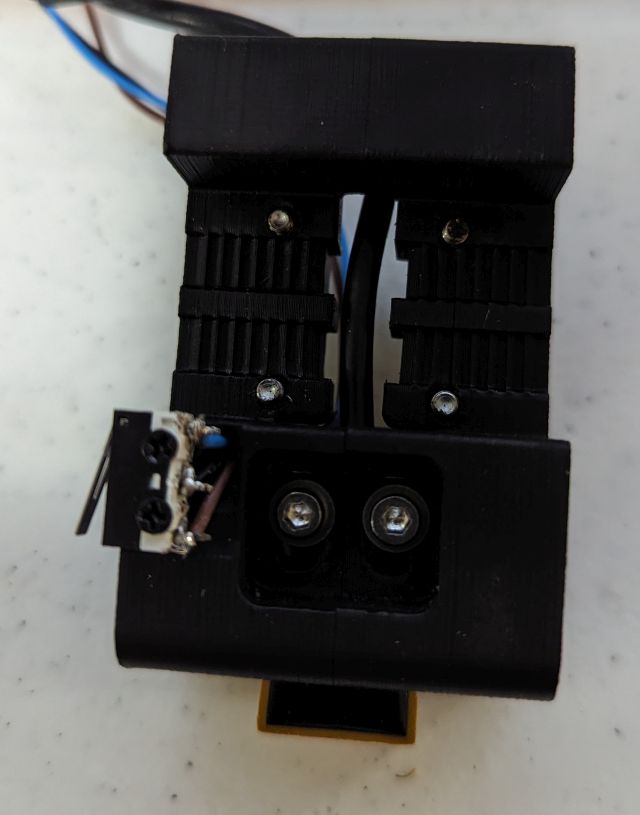
Using BTT u2c 2.1

BTT EBB36 v1.2

https://github.com/EricZimmerman/VoronTools/blob/main/EBB_CAN.md

The End stops must be moved, also need mounts for umbilical:

https://mods.vorondesign.com/detail/ho9WEyf6msbGKhTbtM59mQ

The X-endstop uses existing mounts on the carriage.

Can Bus Cable

I used silicone wire (red/black) 18g and 22g and 1/4 inch nylon sleeve.

You have to widen the end of the sleeve by cutting it off, putting it on
a x-acto knife and re-melting.

It needs a stiffener 3mm nylon or PTFE

I think the opposite twist was good, making the sleeve a bit easier. 
The stiffener (either ptfe or nylon) was critical.

It was somewhat difficult in spite of seeing it done at work so many
times...

Very important to verify that the connectors fit well.

Setup canbus on voron:  (i used 500000, and i think by doing it in this order, it propagates).

https://github.com/rlaferla/Voron/blob/main/CAN_Bus_Guide.md

Setup u2c, follow instructions from:

https://github.com/bigtreetech/U2C/issues/4

setup ebb36 

Follow instructions from:

https://github.com/Arksine/katapult

and 

https://github.com/bigtreetech/EBB  (klipper build settings)

Wiring:

24v probe is problematic.

VERY IMPORTANT, don't forget to remove the USB jumper on the ebb36.  Also, if your canbus cable power works, the power LED lights up on ebb36.


References:

https://forum.vorondesign.com/threads/can-bus-upgrade-information-and-sources.323/

https://bttwiki.com/U2C.html#optional-wiring-diagram

https://lab4450.com/product/ebb36/

https://os.ratrig.com/docs/toolboards/btt/ebb-36-12/


Commands:

edit canbus settings

sudo vi /etc/network/interfaces.d/can0

update canbus #must reboot#sudo ifconfig can0 down;sudo ifconfig can0 up


Show canbus speed:

ip -details -statistics link show can0

hit reset button on EBB36 to bring board into remote mode.

Scan with klippy

~/klippy-env/bin/python ~/klipper/scripts/canbus_query.py can0

python3 ~/katapult/scripts/flashtool.py -i can0 -q

Flash EBB36
 python3 ~/katapult/scripts/flash_can.py -i can0 -u e3972ab4348d -f ~/klipper/out/klipper.bin

https://developer.amazon.com/docs/fire-tablets/connecting-adb-to-device.html

Saturday, December 30, 2023

Fixing windows privileges

 Doesn't seem to work on windows 11.


trying Tweaking.com - Windows Repair

A:  I like to force a disk check with the command "chkdsk /F C:"


<windows><r>
chkdsk /F C:
<ctrl><shift><enter>
y

then reboot

B: fix privileges %userprofile%

ICACLS %userprofile% /T /Q /C /RESET 
takeown /R /SKIPSL /F %userprofile% /D N

then reboot


Sunday, June 25, 2023

Orange pi 5 setup

 running from microSD.

remove "pro"

https://askubuntu.com/questions/1434512/how-to-get-rid-of-ubuntu-pro-advertisement-when-updating-apt

apt-get  --assume-yes  --purge  remove  ubuntu-advantage-tools

apt-get install rsnapshot

apt-get install samba

(I used apt-get install samba* and i think it installed a lot more than necessary)

apt-get install unison

crontab -e
0,15,30,45 *   *   *   *   /home/matt/start_unison_movie
#40 23 * * 6 /home/matt/rsnapshot_run
40 23 * * * /usr/bin/rm /home/root/.unison/lk*
*/5 * * * * /bin/touch /media/matt/2tb_prime/touch &>/dev/null
#*/5 * * * * /bin/mount /dev/md0 /media/backup


secret privilege

GRANT PROXY ON ``@`` TO `matt`@`localhost` WITH GRANT OPTION


add motd file:

98-custommotd 

#!/bin/bash

echo

cat /proc/mdstat

dmesg |grep Gb

echo


Sunday, April 2, 2023

Prusa Slicer Voron Profiles.

The Voron profiles are not very similar to the Prusa MK3s profiles.

The short way is to remove the "Compatible printers condition" restriction to be a prusa....

Set the printer to Prusa MK3s.

Filament to "Generic PETG".  

Switch tab to "Filament Settings".

go to sub tab "Dependencies"

Remove Prusa Vender string in compatible printers condition.


The long (but still useful way is)


In PrusaSlicer 2.6 Set Printer to Voron.

Set filament profile to Basic PET.  

Open tab for "Filament Settings"

Click on save profile (you need to have a local profile to overwrite)

Click on Prusa Diff (mouse over says "Compare this preset with some other"Prusa Diff

Check "Show all presets (including incompatible)"

Change left box to "Generic PETG"

All of the changes will be visible...

On the bottom (in 2.6 only) is a check box "transfer values from left to right"


Tuesday, March 7, 2023

64bit Voron USB setup

 Use Pi Imager to install Klipper 64bit (with login/wifi)

if wifi doesn't work enable by updateding wpa_supplicant

install kiauh

use kiauh 

             install octoprint

                    restore backup

                    uninstall filament sensor, then install

                    klipper config directory:

            uninstall klipper

            install klipper

                   https://www.klipper3d.org/Installation.html

            update all

mount SD card

mount /dev/mmcblk0p1 /media/pi/boot

mount /dev/mmcblk0p2 /media/pi/root


make pi sudoer

/etc/sudoers.d/010_pi-nopasswd


apt-get install samba

 smbpasswd -a pi


enable SPI


sometimes mainsail conflicts with octoprint.

systemctl disable moonraker.service
or 
systemctl disable octoprint.service


Monday, December 19, 2022

Octoprint/Klipper diagnostics

When you install the kiauh way:

klippy.log is in ~/printer_data/logs 

read log via 

~/klipper/scripts/logextract.py ~/printer_data/logs/klippy.log


When you install the Octopi way..

Klippy.log is in tmp.

read Klippy.log using  ~/klipper/scripts/logextract.py  i.e

cp ~/tmp/klippy.log . 

~/klipper/scripts/logextract.py  klippy.log 


Octoprint logs are in:

~/.octoprint/logs


its not uncommon to have klipper fail to connect if you use mcu_pi.

to restart klipper, type following in linux login

sudo service klipper restart

systemctl stop octoprint

service klipper restart

systemctl start octoprint


to add debug into .cfg

{ action_respond_info("_PRINT_START") }


alias cssh='ssh -o StrictHostKeyChecking=no -o UserKnownHostsFile=/dev/null'

sudo service klipper stop;rm klippy.log ;sudo service klipper start


swap between octoprint and 
sudo systemctl disable octoprint.service
sudo systemctl enable moonraker.service
or
sudo systemctl enable moonraker.service
sudo systemctl enable octoprint.service

Saturday, December 10, 2022

Voron Resonance testing

 Based on https://www.klipper3d.org/Measuring_Resonances.html  (I used the pins pictured, not in the table)

ADXL345 pinRPi pinRPi pin name
3V3 (or VCC)01/173.3v DC power
GND06/25Ground
CS24GPIO08 (SPI0_CE0_N)
SDO21GPIO09 (SPI0_MISO)
SDA19GPIO10 (SPI0_MOSI)
SCL23GPIO11 (SPI0_SCLK)


The accelerometer, while cheap, was difficult to wire.  The connection to the pi involves somewhat difficult to clamp wire.
If I did it again, I would use old USB3 cable.
The instructions are again a bit minimalist, I forgot to follow RPi Microcontroller document.
The key is to zero the klippy.log document, the reload.  Klippy.log usually has the errors.
cd /tmp
rm klippy.log
touch klippy.log
attempt to reload firmware, then 
cat klippy.log


to create the plots
find . -name 'calib*' -exec ~/klipper/scripts/calibrate_shaper.py {} -o {}.png \;

Geared Extruder on Prusa i3 mk3s

Geared Extruder on Prusa i3 mk3s

mk3s has overheating problems on extruder motor. this totally fixed it (also fixed with Mk3s+). don't need new firmware, just marlin codes 

M502 

 needed to add: 

 M92 E518 

 M350 E16 

 save config to eprom with M500

 show with M503

Friday, December 9, 2022

Torture Toaster testing

 The Prusa Mk3s+ printed it prefect first time.  I suspect because it had a Gear Motor (thus had the extrusion tuned for the motor)

https://www.printedsolid.com/products/ldo-nema-17-geared-extruder-motor-ldo-42sth25-1004acpg3

The Bear Mk3s+ failed on .1, I assume because of slight over extrusion.  Changed the extrusion multiple by 2% and it passed (on PETG..)

M92 E276

M500

The Voron failed even after extrusion correction.

top is Prusa, bottom is voron.


The following is after shaping and small chamber fan. The voron passed except for the "handle" looks ugly (its a long 80 degree overhang).


Voron passed with cheap ABS+ after using Ellis's settings

    https://github.com/AndrewEllis93/Ellis-SuperSlicer-Profiles
    and
    https://ellis3dp.com/Print-Tuning-Guide/
    he has profiles.  You have to pull them into prusa slicer, then you can compare.  (basically you pull in the .ini, it messes everything up, but you kinda rebuild it and I think its good).
    I had to discard all but filament profile.

Thursday, December 8, 2022

Voron Trident Formbot kit Build


The Voron Trident build took about 40 hours + 40 hours of tuning...I had Covid at the time so I would have been able to build it faster normally, but was able to concentrate on it almost 100%.

I printed the parts with a (untuned) Prusa MK3s and a MK3s Bear Clone.  The Bear clone was placed in the Voron Shipping Box with plastic in front and a space heater...worked very well.

Long parts were difficult (most had a failure or two) because the chamber temp was ~100F (because it was winter and 40F in garage.

The manual was minimalist and I don't think it would work as first printer. 

I had a lot of difficulty with the Z Stop (you have to assemble the z stop prox switch by hand, its a bit goofy.)  

I replaced the hammer head nuts for the left clear panel with t-nuts.  It seems like you have to remove this panel a lot.

Problems:

 There needs to be a wire run on the rear left AB drive frame part.


  If the z stop moves, it caused the head to press against the plate.  I will reprint with PC if it moves again, but it should be very tight.
    the second one is the reason for the ABS w/r XY joint parts.  The system seems like it is built to twist on too much pressure between the bed and the nozzle.
This is pretty awesome.  If your live adjust Z is too low you get a very ugly perimeter, and should stop the print.  Even extremely bad values are unlikely to seriously damage your build plate or nozzle.  In addition, it seems the extruder can still push filament out while live adjust Z is too low.

There is very little room for the camera.  I don't think anything but the pi-cam could fit, and wiring is very tough.

Monday, March 28, 2022

Long Exposure Day Time Photography


While planning for a Long Exposure Daylight Photography workshop I found remote triggering to be artificially difficult.

Using "WiFi remote" app on your phone, completely takes over the phone, preventing the use of a timer, and disabled ISO64 on my D850.

As a result, I decided to use Exposure stacking.

The setup to take the photo is super easy:

Set camera on a tripod, in aperture mode with appropriate depth of focus.  Use ISO for fine adjustment of Exposure time.
Camera must have long exposure NR turned off

Long exposure target exposure time between 1 and 8 seconds.  
If your target is 5 min, that's 300 photos at 1 second.
Target between 4 and 8 seconds per photo.  

Its best to use a N1000 (i.e. 3 stop ND filter) alone.  (multiple filters cause vignetting).

8 seconds Exposure time should be:
1/125 for ND1000
1/1000 for ND1000+ND8
Camera should be on tripod, AF on, VS off

Take the photo and check histogram.

Put the ND filter(s) on, turn off AF

Take another shot and check histogram and vignetting.

Start interval intervalometer.


Nikon 850d has minimum time for internal intervalometer delay of .5 seconds. (750d is 1 sec).

With a remote shutter you can just leave it down, and it will take photo after photo.

For Processing:
download imagemagick
https://imagemagick.org/index.php

put each series in a directory, pay attention to only include 8sec shots.
run imagemagick on the command line
"C:\Program Files\ImageMagick-7.1.0-Q16-HDRI/magick.exe" *.NEF -evaluate-sequence mean OUT_mean.TIF

"C:\Program Files\ImageMagick-7.1.0-Q16-HDRI/magick.exe" *.NEF -evaluate-sequence median OUT_median.TIF

"C:\Program Files\ImageMagick-7.1.0-Q16-HDRI/magick.exe" -resize 25% -delay 20 -loop 0 *.JPG OUT_gif.gif


Sunday, January 20, 2019

Cheap Filament problems and advantages

When I started 3d printing (Prusa i3 m3), I bought a lot of cheap filament.

I printed a roll of cheap black ABS ($10/roll on amazon), and found my printer didn't work anymore.  The cause was a significantly expanded nozzle.

New Rule...Have lots of spare cheap brass nozzles.  Use a new nozzle every time you change nozzle size.

The dull grey is Amazon basics PLA, the shiny grey is Ebay cheap grey.  The Ebay stuff has poor adhesion (for PLA), is super fragile (filament breaks every time i weigh it), but looks great.

Both cheap filaments have horrible bridging.  The cheap grey is so bad I had to add extra layers on top.


Tuesday, July 4, 2017

Solar System Two

Trying to meet CPAP requirements:

http://www.healthyresources.com/sleep/magazines/psnews/power03.html

    here are the three parts:
the panels, order now on ebay ($160)

http://www.ebay.com/itm/Mono-Poly-PV-Solar-Panel-160W-100W-90W-40W-25W-10W-5W-12V-24V-RV-Boat-Camping/361878817780?ssPageName=STRK%3AMEBIDX%3AIT&_trksid=p2060353.m2749.l2649

    Costco batteries:
    best is 140wh (2 70wh deep cycle costco batteries)

charge controller:

    http://www.ebay.com/itm/5-10-15-20-30A-PWM-Solar-Panel-Battery-Regulator-Charge-Controller-CE-12V-24VMS-/272672199604?var=&hash=item3f7c8793b4


extension cables:

http://www.ebay.com/itm/1-Pair-TEMCo-10ft-MC4-Solar-Panel-Extension-Connector-12-AWG-PV-Cable-Wire/281368913995?ssPageName=STRK%3AMEBIDX%3AIT&_trksid=p2057872.m2749.l2649


Wednesday, February 15, 2017

Inexpensive Solar system

Solar panel Notes:
Optimum angle for solar
              Fixed--~30 Degrees
Two season
              Summer (march 30-september 12th)- ~8 degrees
              Winter (rest of year ~45 degrees).
Sites:
Note, angle for grid-tie is very different than off-grid.  (because you are watching for optimal energy generation the whole day.

For the mini off-grid installations, current position is good for winter (until march 30), lay on top during summer.

Batteries for mini-grid
System works for either 12 or 24 volt battery systems (however, you need different output systems for 24v)  For simplicity, I recommend all small systems stay at 12v.
You can use 2 6v batteries in series to get 12v, but they must be very very similar.
Checkout of Battery
Battery checkout is the most dangerous step.  It is a little safer to do battery checkout with a smart charger (from 110), but it can be tricky in other ways.  (I had fully discharged batteries take days to recover on a charger, but I think the charge controller would have quickly worked).
Do not attach a battery directly to an array of batteries.  (Even a good battery could rapidly charge, generating hydrogen, and explode, spraying sulfuric acid.)  Battery testing should be done outside.  Batteries should always be on a thermal insulator (like a piece of wood).  Lead-acid Batteries are not really a fire risk.  (all types of lithium batteries are a fire risk because they have ~10x energy density).
The Charge controller to battery hookup has clips for this reason.
#1 measure new battery voltage (should be between 9 and 12 volts, but not necessary).
#2 remove clips from existing batteries and attach to new battery (battery should be at least 30#s).
#3 measure new battery voltage (do this during the day).  Within 10 min battery should be between 9 and 12 volts.  If battery is not quickly moving to 9 volts you may have a problem.
#4 Everything should work right away, but avoid placing heavy loads, and night use
#5 Every evening and morning check the battery voltage to get a feel for self-discharge and capacity.

Loads
The charge controller is a 42v 30A device.
That means that if any circuit goes over 42v and/or 30A, at least that part and likely everything fails.

So voltage open circuit (VOC) of the solar panels should be less than 42 volts.

Friday, September 11, 2015

More Windows 10

Removing OneDrive from windows 10

http://answers.microsoft.com/en-us/insider/forum/insider_wintp-insider_files/how-to-uninstall-onedrive-completely-in-windows-10/e735a3b8-09f1-40e2-89c3-b93cf7fe6994?auth=1

Remember to clean up the registry afterwards.

Sunday, August 16, 2015

Windows 10

I've been updating my computers to windows 10.

Good:  generally works.  Particularly, on the slowest machine, seemed to work better.

Bad:  some driver issues.   bluetooth confused (thought it was USB, had to uninstall and reinstall a few time).

Bad: lots of advertising.

to get rid of stupid metro aps:

http://www.howtogeek.com/224798/how-to-uninstall-windows-10s-built-in-apps-and-how-to-reinstall-them

used the following commands

Get-AppxPackage *3dbuilder* | Remove-AppxPackage
 Get-AppxPackage *windowscommunicationsapps* | Remove-AppxPackage
 Get-AppxPackage *officehub* | Remove-AppxPackage
 Get-AppxPackage *skypeapp* | Remove-AppxPackage
 Get-AppxPackage *getstarted* | Remove-AppxPackage
 Get-AppxPackage *zunemusic* | Remove-AppxPackage
 Get-AppxPackage *windowsmaps* | Remove-AppxPackage
 Get-AppxPackage *solitairecollection* | Remove-AppxPackage
 Get-AppxPackage *bingfinance* | Remove-AppxPackage
 Get-AppxPackage *zunevideo* | Remove-AppxPackage
 Get-AppxPackage *bingnews* | Remove-AppxPackage
 Get-AppxPackage *onenote* | Remove-AppxPackage
 Get-AppxPackage *people* | Remove-AppxPackage
 Get-AppxPackage *windowsphone* | Remove-AppxPackage
 Get-AppxPackage *photos* | Remove-AppxPackage
 Get-AppxPackage *windowsstore* | Remove-AppxPackage
 Get-AppxPackage *bingsports* | Remove-AppxPackage
 Get-AppxPackage *soundrecorder* | Remove-AppxPackage
 Get-AppxPackage *bingweather* | Remove-AppxPackage
 Get-AppxPackage *xboxapp* | Remove-AppxPackage
Get-AppxPackage *travel* | Remove-AppxPackage
Get-AppxPackage *reading* | Remove-AppxPackage
Get-AppxPackage *camera* | Remove-AppxPackage

Friday, February 20, 2015

Bash script for Cygwin to read in camera images from SD card

#this script does a nice job of reading in DCIM cards
#run with ./get_picts title
#it creates a folder with a date if the name is defaulted, appends drive name, then title.


#!/bin/bash
thisTitle=$*
getlabel() {
$(cygpath --sysdir)/cmd /c dir ${1}:\\ | \
    tr \\r \\n | \
    sed -n -e '1s/^ Volume in drive . is //p'
}

cd /cygdrive/c/DCIM
cd ~/DCIM
for i in e f g h i j k l m
#
#DIRS=`ls -d /media/matt/*/DCIM`
#echo $DIRS
#for thisTarget in $DIRS
do

    thisTarget="/cygdrive/${i}/DCIM"
    if [ -d "$thisTarget" ]; then
        driveName=`getlabel ${i}`
        echo  $driveName
        thisDate=$(date +%y%m%d)
        #echo $thisDate
        #echo $thisTitle
        thisDate=$thisDate"_"$driveName"_"$thisTitle
        echo $thisDate
        #read -p "Press [Enter] key to start copy..."

        if [ -d "$thisTarget/101ND610" ]; then
            mv "$thisTarget/101ND610" "$thisTarget/$thisDate"
        fi
        if [ -d "$thisTarget/101D3200" ]; then
            mv "$thisTarget/101D3200" "$thisTarget/$thisDate"
        fi
        if [ -d "$thisTarget/100D3200" ]; then
            mv "$thisTarget/100D3200" "$thisTarget/$thisDate"
        fi
        mv -f $thisTarget/1* .
        for jj in $(ls -d $thisTarget/* | xargs -n1 basename)
        do
            for kk in _1 _2 _3 _4 _5 _6 _7 _8
            do
                if [ -d $jj$kk ]; then
                    echo $jj$kk
                else
                    mv -f $thisTarget/$jj  $jj$kk   
                    break
                fi
            done
        done
        rmdir $thisTarget
    fi
done
find . -type d -exec rmdir --ignore-fail-on-non-empty -p {} \;
find . -name "DSC*.JPG" -ls -exec exifautotran {} \;
find . -name "IMG*.JPG" -ls -exec exifautotran {} \;
find . -name "DSC*.JPG" -ls -exec exiftool  -d %Y.%m.%d-%H.%M.%S%%-c '-filename<$CreateDate-$filenumber.%e' {} \;
find . -name "DSC*.NEF" -ls -exec exiftool  -d %Y.%m.%d-%H.%M.%S%%-c '-filename<$CreateDate-$filenumber.%e' {} \;
find . -name "IMG*.PEF" -ls -exec exiftool  -d %Y.%m.%d-%H.%M.%S%%-c '-filename<$CreateDate-$filenumber.%e' {} \;
find . -name "IMG*.PEF" -ls -exec exiftool  -d %Y.%m.%d-%H.%M.%S%%f%%-c '-filename<$CreateDate.%e' {} \;
find . -name "IMG*.CR2" -ls -exec exiftool  -d %Y.%m.%d-%H.%M.%S%%-c '-filename<$CreateDate-$filenumber.%e' {} \;
find . -name "IMG*.DNG" -ls -exec exiftool  -d %Y.%m.%d-%H.%M.%S%%-c '-filename<$CreateDate-$filenumber.%e' {} \;
find . -name "IMG*.DNG" -ls -exec exiftool  -d %Y.%m.%d-%H.%M.%S%%f%%-c '-filename<$CreateDate.%e' {} \;
find . -name "IMG*.JPG" -ls -exec exiftool  -d %Y.%m.%d-%H.%M.%S%%-c '-filename<$CreateDate-$filenumber.%e' {} \;
find . -name "IMG*.JPG" -ls -exec exiftool  -d %Y.%m.%d-%H.%M.%S%%f%%-c '-filename<$CreateDate.%e' {} \;
find . -name   "P*.JPG" -ls -exec exiftool  -d %Y.%m.%d-%H.%M.%S%%-c '-filename<$CreateDate-$filenumber.%e' {} \;
find . -name   "P*.JPG" -ls -exec exiftool  -d %Y.%m.%d-%H.%M.%S%%f%%-c '-filename<$CreateDate.%e' {} \;


Thursday, October 31, 2013

Simple shell script to import photo's from SD card.


cd /cygdrive/c/DCIM
for i in e f g h i j k l m
do
thisTarget="/cygdrive/${i}/DCIM"
if [ -d "$thisTarget" ]; then
thisDate=$(date +%y%m%d)
if [ -d "$thisTarget/100ND610" ]; then
mv "$thisTarget/100ND610" "$thisTarget/$thisDate"
fi
mv -f $thisTarget/1* .
for jj in $(ls -d $thisTarget/* | xargs -n1 basename)
do
for kk in _1 _2 _3 _4
do
if [ -d $jj$kk ]; then
echo $jj$kk
else
mv -f $thisTarget/$jj  $jj$kk
break
fi
done
done
rmdir $thisTarget
fi
done
find . -type d -exec rmdir --ignore-fail-on-non-empty -p {} \;
find . -name "DSC*.JPG" -ls -exec exifautotran {} \;
find . -name "IMG*.JPG" -ls -exec exifautotran {} \;
find . -name "DSC*.JPG" -ls -exec exiftool  -d %Y.%m.%d-%H.%M%%-c.%%e "-filename<CreateDate" {} \;
find . -name "DSC*.NEF" -ls -exec exiftool  -d %Y.%m.%d-%H.%M%%-c.%%e "-filename<CreateDate" {} \;
find . -name "IMG*.PEF" -ls -exec exiftool  -d %Y.%m.%d-%H.%M%%-c.%%e "-filename<CreateDate" {} \;
find . -name "IMG*.CR2" -ls -exec exiftool  -d %Y.%m.%d-%H.%M%%-c.%%e "-filename<CreateDate" {} \;
find . -name "IMG*.DNG" -ls -exec exiftool  -d %Y.%m.%d-%H.%M%%-c.%%e "-filename<CreateDate" {} \;
find . -name "IMG*.JPG" -ls -exec exiftool  -d %Y.%m.%d-%H.%M%%-c.%%e "-filename<CreateDate" {} \;
find . -name "P*.JPG" -ls -exec exiftool  -d %Y.%m.%d-%H.%M%%-c.%%e "-filename<CreateDate" {} \;